
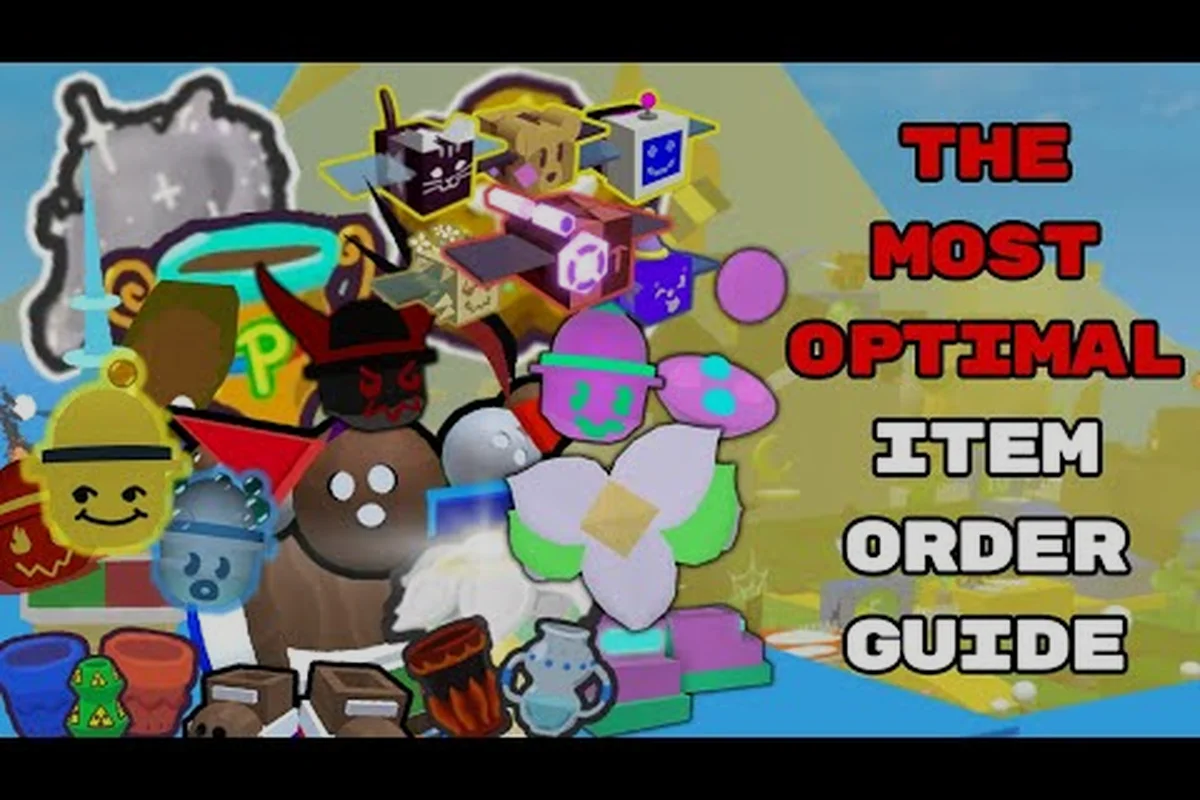
Every new player in Bee Swarm Simulator faces the same dilemma: honey is scarce, and every shop item looks tempting. This bee swarm simulator efficiency guide cuts through the noise by ranking exactly what to buy early so you never waste honey on upgrades that look good but stall your progression. Because the game's idle loop punishes poor spending decisions, knowing where your first 100,000 honey goes can double your pollen collection speed within the first week.
The core loop is simple — bees collect pollen from flowers, convert it to honey at the hive, and honey buys better bees and gear — but the order of purchases determines whether you hit the mid-game in days or weeks. If you want the fastest start possible, this guide walks through the shop priorities, backpack upgrades, and hive slots that matter most, while flagging the traps that new players fall into. By the end, you will know exactly how to spend every drop of honey from your first hour through your first million.
The Efficiency Mindset: Why Spending Order Beats Grinding Time
Efficiency in Bee Swarm Simulator is not about playing longer; it is about making every second of collection count. Most beginners assume that buying every new bee egg as soon as possible is the right move, but that logic ignores a fundamental truth: hive slots and backpack capacity multiply the value of every bee you own. A level 5 bee in a hive with 15 slots and a 10,000-pollen backpack outperforms a level 8 bee in a 5-slot hive with a 1,000-pollen backpack, because the larger hive collects more pollen per second and the bigger backpack means fewer trips back to the hive.
The pollen-to-honey conversion ratio is the other half of the equation. When you convert pollen at the hive, you receive honey based on your current conversion rate, which is boosted by hive bonuses, field boosts, and equipment multipliers. This means that spending honey on a new backpack that increases capacity by 50% can effectively increase your honey-per-hour by the same margin, because you spend less time running back and forth and more time collecting. Community testing on the r/BeeSwarmSimulator subreddit consistently confirms that capacity upgrades outperform bee eggs in the first three days of play.
The table below breaks down the early spending priorities that most speedrunners and experienced players recommend, based on aggregated community reports from the official Discord server and the subreddit:
| Purchase Priority | Item Type | Honey Cost Range | Impact on Progression |
|---|---|---|---|
| 1st | Backpack upgrades (Pollen Backpack) | 1,000 – 25,000 | Reduces return trips, boosts pollen per hour |
| 2nd | Hive slots (up to 10) | 500 – 10,000 | More bees = more pollen collection per second |
| 3rd | Basic tools (Sparkling Staff early) | 5,000 – 15,000 | Faster pollen collection, better field coverage |
| 4th | Silver/Gold eggs | 1,000 – 5,000 | Unlocks new bee types, but situational value |
| 5th | Royal Jelly | 500 each | Only useful when you have duplicate bees to reroll |
Understanding the Honey Sink: Where New Players Leak Resources
The single biggest leak in the early game is buying eggs blindly without checking what bee types you already have. Each hive slot should hold a different bee type to maximize the bond and ability token variety, so spending honey on a new egg that duplicates a bee you already own is pure waste. Instead, save honey for the Egg Shop's next tier unlock, which always introduces a bee with a unique ability that boosts your collection in a new way.
Another common leak is upgrading tools too early. The Sparkling Staff is a solid first upgrade because it adds a bubble pollen mechanic that collects from multiple flowers at once, but the Petal Wand and higher-tier tools cost hundreds of thousands of honey that should go toward hive slots first. Players who rush tool upgrades often find themselves with a powerful staff but no bees to benefit from it, because their hive is still at 8 slots with basic bees.
The First Hour: A Step-by-Step Spending Plan
Your first hour sets the tone for the entire run, so follow this order: collect 1,000 honey from the Sunflower Field, buy the first backpack upgrade, then push to 5,000 honey for the second backpack tier. After that, save for the third hive slot (costs 500 honey) and the fourth (1,000 honey), because each new bee adds roughly 20% more collection output when you have fewer than 10 bees. The basic tools can wait until you have at least 6 hive slots filled.
Once you have 6 bees and a 5,000-pollen backpack, start completing Black Bear's quests, because they reward tickets and honey that fund your next wave of upgrades. According to the official Bee Swarm Simulator page on Roblox, the game is designed so that quest rewards scale with your hive size, meaning that investing in hive slots early compounds the value of every quest you complete. This is the fastest start because it aligns your spending with the game's natural reward curve.
Ranking the Best Early Game Bees for Efficiency
Not all bees are created equal in the early game, and choosing the right ones for your first 10 slots makes a measurable difference in your honey-per-hour. The Common bees (yellow, with basic pollen collection) are placeholders, but the Rare bees you unlock from the Silver Egg and Gold Egg introduce ability tokens that trigger boosts like Haste, Focus, and Pollen Burst. Because these tokens fire automatically while the bee is in the field, having a diverse set of ability tokens is more valuable than having multiple copies of the same strong bee.
The Legendary bees — especially Honey Bee, Rage Bee, and Demon Bee — are worth chasing with Royal Jelly once you have 10+ hive slots, but before that point, their high cost in jelly (up to 500 honey per roll) is better spent on capacity and slots. The table below ranks the most efficient early bees based on community testing data from the official Discord, which tracks pollen contribution per hour for each bee type at level 5:
| Bee Type | Rarity | Ability Token | Early Game Value (1-10) | Best Use Case |
|---|---|---|---|---|
| Basic Bee | Common | None | 3 | Filler until better bees arrive |
| Hasty Bee | Rare | Haste | 7 | Speed boost for field rotation |
| Brave Bee | Rare | Focus | 6 | Increases critical pollen chance |
| Honey Bee | Legendary | Honey Halo | 9 | Converts pollen passively while collecting |
| Rage Bee | Legendary | Rage | 8 | Boosts attack and collection speed |
| Demon Bee | Legendary | Demon Slash | 7 | High damage for boss fights |
Why Ability Tokens Matter More Than Raw Stats
The ability token system is the hidden engine of efficiency, because tokens fire independently of your active collection. A Hasty Bee with its Haste token makes your character move faster between flowers, which reduces downtime. A Honey Bee with its Honey Halo token passively converts nearby pollen into honey while you keep collecting, effectively doubling your output in dense fields. These tokens stack when you have multiple bees of the same type, but the diminishing returns mean that one of each type is better than three of the same.
This is why the best start involves checking the Bee Journal after every new egg hatch to see which abilities you have covered. If you already have a Haste token, skip the next Hasty Bee and save for a Brave Bee or Rad Bee instead. The progression tips here are simple: diversity of tokens beats raw bee level in the early game, because the tokens multiply every other bee's output in the field.
The Royal Jelly Gamble: When to Roll and When to Save
Royal Jelly is the only way to change a bee's type without hatching a new egg, and it costs 500 honey per roll from the Item Shop. The efficiency rule is to only use Royal Jelly when you have a duplicate bee that you want to convert into a missing type, because rolling on a full hive of unique bees risks replacing a valuable ability token with a duplicate. Community reports indicate that the legendary chance from Royal Jelly is roughly 1 in 20 rolls, so budget at least 10,000 honey before attempting to chase a specific legendary.
For a fast start, save all Royal Jelly until you have 8-10 unique bees, then use it to fill gaps in your ability token coverage. The Honey Bee is the highest-value target because its passive conversion works even when you are running between fields, making it the single best early-game efficiency purchase. If you want a deeper dive into the mechanics of rerolling, the beginner guide covers the full progression curve from first hatch to endgame hive.
What to Buy Early: Shop Priorities Ranked by Value
The Item Shop and Egg Shop offer dozens of items, but only a handful deliver real efficiency gains in the first week. The Pollen Backpack upgrades are the undisputed king of early value because each tier roughly doubles your capacity, and the cost scales from 1,000 to 25,000 honey. The Hive Slots from the Hive Shop are the second priority because each slot adds a permanent collection boost, and the cost curve from 500 to 10,000 honey is extremely forgiving in the first few days.
The Tools are the trickiest category because the Sparkling Staff (5,000 honey) is a meaningful upgrade, but the Petal Wand (250,000 honey) is a trap that delays hive growth for a marginal collection bonus. The Field Boosts and Dice from the Item Shop are situational — they shine during boost stacking sessions but waste honey if used randomly. The table below ranks every major shop category by its efficiency value in the first 48 hours of play:
| Shop Category | Best Item to Buy Early | Honey Cost | Efficiency Rating | When to Skip |
|---|---|---|---|---|
| Backpacks | Pollen Backpack (Tier 2) | 5,000 | 10/10 | Never skip until Tier 4 |
| Hive Slots | Slot #6 to #10 | 500 – 5,000 | 9/10 | Skip only if all slots filled |
| Tools | Sparkling Staff | 5,000 | 8/10 | Skip if you already have it |
| Eggs | Silver Egg (first time) | 1,000 | 7/10 | Skip after you have 10+ bees |
| Consumables | Field Boost (red) | 250 | 6/10 | Skip unless stacking boosts |
| Royal Jelly | Save for later | 500 each | 5/10 | Skip until 8+ unique bees |
The Backpack Capacity Breakpoint: When to Stop Upgrading
The backpack capacity system has a sweet spot: once your backpack holds 25,000 pollen, the time saved by further upgrades starts to diminish because you will be converting honey frequently anyway to fund other purchases. The Tier 4 backpack (25,000 capacity) is the efficiency breakpoint for the early game, because it lets you farm the Clover Field and Blue Flower Field for extended sessions without returning to the hive. Beyond Tier 4, the cost jumps to 100,000+ honey, which is better spent on hive slots and legendary bees.
The efficiency guide rule of thumb is to keep backpack upgrades within 20% of your current honey reserves. If a backpack tier costs 25,000 honey and you have 30,000, buy it. If you have 20,000, save for hive slots first. This balancing act ensures that your honey per hour grows steadily without starving other critical upgrades. Players who ignore this balance often find themselves with a massive backpack but a 6-bee hive that cannot fill it efficiently.
Hive Slot Strategy: The 10-Slot Milestone
The 10-slot hive is the single most important milestone in the early game, because it unlocks the ability to field a full rainbow hive (one of each bee type). The cost curve for slots is forgiving — the 6th slot costs 500 honey, the 7th 1,000, the 8th 2,000, the 9th 4,000, and the 10th 8,000 — and the total investment of 15,500 honey pays for itself within hours. Once you hit 10 slots, every quest reward and field boost scales with your full hive, which is why the early game guide lists this as the first major milestone.
The fast start strategy is to prioritize slots 6 through 10 over any tool upgrade beyond the Sparkling Staff, because each slot represents a permanent 10% collection boost that compounds with every bee level. After the 10th slot, the cost jumps to 16,000 honey and the value per slot drops, so that is the natural point to shift spending toward legendary bees and amulet upgrades.
Field Rotation and Boost Stacking for Maximum Output
Efficiency is not just about what you buy — it is also about where you farm and when you use boosts. The field rotation strategy involves cycling through the Sunflower Field, Dandelion Field, and Clover Field based on which flowers are blooming, because each field has a flower boost that rotates hourly. The Blue Flower Field and Strawberry Field unlock later, but the early fields are sufficient for the first week if you rotate correctly.
Boost stacking is the technique of activating multiple boosts simultaneously — a field boost from the Item Shop, a boost token from a bee's ability, and a red boost from the Boost Station — to multiply your pollen collection by 5x or more for a short window. The efficiency play is to save your boosts for quest completion moments, because the honey reward from a quest scales with the pollen you collected during that quest. The table below shows the optimal field rotation for the first week:
| Day | Primary Field | Secondary Field | Boost Strategy |
|---|---|---|---|
| Day 1 | Sunflower Field | Dandelion Field | Save boosts, focus on hive slots |
| Day 2 | Clover Field | Blue Flower Field | Use one field boost during quest |
| Day 3 | Strawberry Field | Sunflower Field | Stack field boost + bee ability token |
| Day 4 | Blue Flower Field | Clover Field | Use red boost before boss fight |
| Day 5+ | Rotate based on flower bloom | Highest-level field unlocked | Stack 2-3 boosts for honey rush |
The Quest Rotation: Aligning Quests with Field Boosts
Black Bear and Mother Bear offer repeatable quests that reward honey and tickets, and the efficiency trick is to accept a quest, check which field it targets, and then use your field boosts only when you are actively grinding that field. This alignment ensures that your boost windows always overlap with quest progress, doubling the value of every boost token you consume. The progression tips here are to always have an active quest, because the quest reward is essentially free honey on top of your normal collection.
The best start players also track the flower bloom schedule on the community wiki, because farming a field during its bloom window adds a 2x multiplier to all pollen collected there. This is a passive efficiency gain that costs nothing, and it compounds with your boost stacking to produce honey-per-hour numbers that are 3-4x higher than a player who farms randomly. According to community reports on the official Discord, players who follow a strict rotation hit their first 1 million honey in about 8 hours of play, while random farmers take 15-20 hours.
When to Use the Boost Station vs. Item Shop Boosts
The Boost Station at the hive offers a free boost every few hours, while the Item Shop sells instant boosts for honey. The efficiency rule is to use the free Boost Station boost first, then stack a purchased boost on top if you are in the middle of a high-value field rotation. The red boost (2x pollen) is the best value at 250 honey, while the blue boost (2x capacity) is situational — it shines when your backpack is nearly full and you want to extend a farming session.
The honey per hour metric is the ultimate test of any boost strategy, and the honey-making guide breaks down the exact boost sequences that maximize output. For the early game, the rule is simple: never use a purchased boost unless you have an active quest in a blooming field, because that combination produces the highest return per honey spent.
Progression Tips: Avoiding the Mid-Game Stall
The mid-game stall is the most common reason players quit Bee Swarm Simulator, and it happens when they hit the 15-slot hive but lack the legendary bees and amulets to push into the Pine Tree Forest and Cactus Field. The stall occurs because the cost of hive slots jumps to 50,000+ honey, and the legendary bees from Royal Jelly become the bottleneck. The efficiency fix is to start saving for the Mythic Egg questline early, because the mythic bees — Fuzzy Bee, Precise Bee, and Vector Bee — are the endgame efficiency kings.
The what to buy early question changes at this point: instead of hive slots, prioritize amulet upgrades from the Item Shop (the Gold Amulet and Diamond Amulet add collection multipliers), and ticket items like the Cloud Vial that boost conversion rate. The progression tips for the mid-game are to focus on bee levels over new bee types, because a level 10 legendary bee outperforms a level 5 mythic bee in most fields.
The Mythic Egg Questline: When to Start
The Mythic Egg questline from Panda Bear unlocks after you complete a certain number of total quests, and it rewards one of the three mythic bees. The efficiency play is to start this questline as soon as it unlocks, because the quest requirements — collecting pollen in specific fields and defeating bosses — align with normal progression. The mythic bees are so powerful that they justify redirecting all honey toward their leveling for a week after acquisition.
The fast start players who reach the mythic egg within their first month typically follow a strict quest priority: always complete Panda Bear's quests first, then Black Bear's, then Science Bear's, because the mythic egg reward compounds with every day of earlier completion. The community data from the subreddit shows that players who delay the mythic questline by even a week lose roughly 30% of their potential honey-per-hour by the endgame.
The Leveling Curve: Treats, Honey, and the 20% Rule
Bee leveling is the final efficiency lever, and the 20% rule is the community consensus: never spend more than 20% of your honey reserves on treats at any given time. Treats are the fastest way to level bees, but they are also a permanent sink that does not unlock new abilities — it only boosts existing stats. The efficiency play is to level your legendary bees to level 7-8 first, because that is the sweet spot where their ability tokens fire more frequently, then spread treats evenly across the hive to keep collection output balanced.
The progression tips for leveling are to prioritize bees with passive abilities (like Honey Bee) over bees with active abilities (like Rage Bee), because passive abilities benefit every second of collection while active abilities only fire during specific conditions. This is the kind of nuance that separates a good player from a great one, and it is exactly what this efficiency guide aims to teach.
Frequently Asked Questions
What is the best first purchase in Bee Swarm Simulator?
The Pollen Backpack Tier 1 upgrade (1,000 honey) is the best first purchase because it reduces return trips to the hive, which directly increases your pollen-per-hour. Follow it with the second backpack tier at 5,000 honey, then shift to hive slots. This spending order compounds your collection speed faster than any bee egg purchase.
How many hive slots should I unlock before buying legendary bees?
Reach 10 hive slots before spending honey on Royal Jelly or legendary bee chases. The 10-slot rainbow hive provides enough ability token diversity that legendary bees become meaningful upgrades rather than expensive fillers. Each slot costs between 500 and 8,000 honey, and the total 15,500 investment pays for itself within hours of farming.
Is the Sparkling Staff worth buying early?
Yes, the Sparkling Staff at 5,000 honey is worth it because its bubble pollen mechanic collects from multiple flowers at once, effectively boosting your collection speed by 30-40%. However, skip the Petal Wand until you have 15+ hive slots, because its 250,000 honey cost delays critical hive growth for a marginal collection bonus.
What is the fastest way to get honey in the first week?
The fastest method combines quest alignment with boost stacking: always accept a quest, farm the field it targets during its bloom window, and stack a purchased field boost with the free Boost Station boost. Community data shows this rotation produces 3-4x more honey per hour than random farming, hitting 1 million honey in about 8 hours.
When should I start the Mythic Egg questline?
Start the Mythic Egg questline from Panda Bear the moment it unlocks. The quest requirements—collecting pollen, defeating bugs, and earning honey—align with your normal early-game grind, so there's no extra time cost. Delaying a week costs roughly 30% of your endgame honey-per-hour, making early completion a compounding efficiency win.